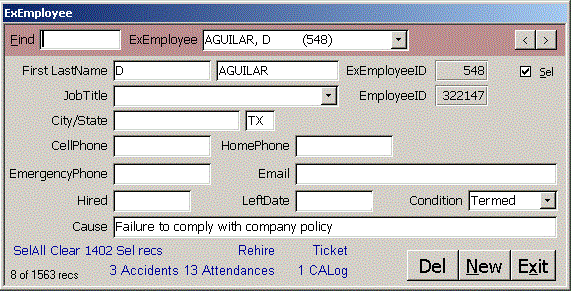
Find in | (ExEmployee)ID | EmployeeID | LastName, FirstName | City | Condition | Cause | LeftDate | SEL |. Use the pipe symbol (vertical | bar) to separate multiple fields or mark the start or end of a field and reduce false hits. Find for |SEL| to see records where the Sel checkbox is checked. To find all employees who quit, find for Quit. Find for 1 would return ID or EmployeeID 1, 11, 12, 21, 31. To limit the records returned, Find for |1|, which would find only fields that were exactly 1. You can stack Finds together using the * wildcard that matches any number of characters or the ? that matches any single character. To Find all job title drivers from Dallas, Find for |Dallas|*|Driver|. The order of fields is important, but case is not. The record counter in the lower left of the form shows how many records you have found. Click the Find box to clear it and find all records again. The F on Find is underlined to show it is a hotkey, so Alt-F from the keyboard works the same as clicking the Find box. The ExEmployee combo lets you pick a specific ExEmployee. You can use the < Prev and > Next buttons in the upper right corner of the form, or use the PageDown and PageUp keys to navigate through the recordset. SelAll in the lower left corner of the form sets the Sel checkbox in all records in the found recordset to true. Clear x SelRecs sets them to false.
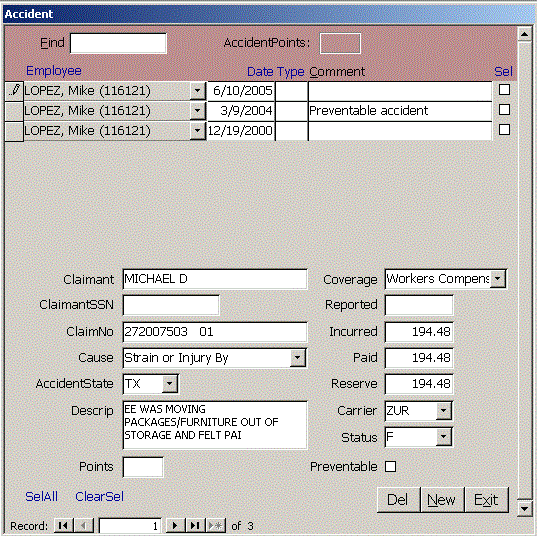
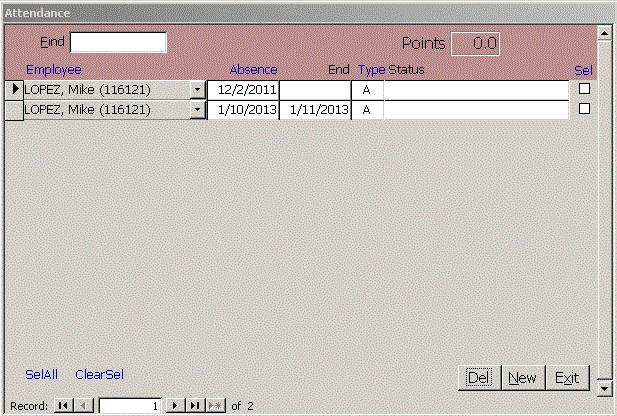
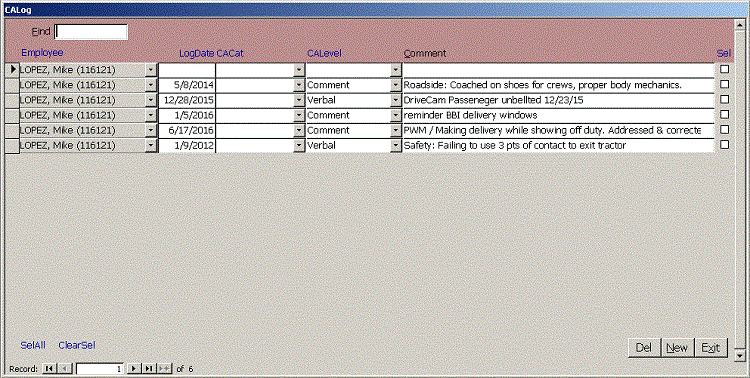
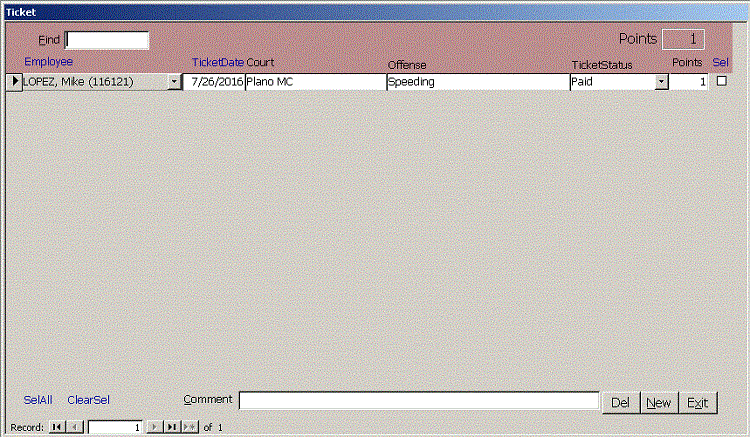
These features are additive so you could find for Dallas, SelAll, find for Fort Worth, SelAll and repeat the process Arlington, Garland, Irving, Plano, Carrollton, Denton, Frisco, Grand Prairie, McKinney, Mesquite and Richardson to find the larger cities in the DFW metroplex. Similarly, you could find |Smith|, Clear x Sel Recs, find |Jones|, Clear x Sel Recs and exclude all whose last name was either Smith or Jones. You can use the complex selections to create reports, export data, delete or edit records. As you tab through the fields, the status bar text above the Start button changes to show what is expected in that field. Fields like Region and WH may be grayed out if you don't have the right to change them. To enter dates in the current year, type month/day, like 7/27 for July 27. You can enter the year like 5/2/1980 for May 2, 1980. Click the calendar to the right of the date field to choose the date from a calendar. The numeric + adds a day and the numeric - subtracts a day from the date shown. DoubleClick to set the date to today or clear the date that is entered. Click the blue Rehire label to copy the record back to the Employee table. Once you enter the DLNo, that field is hidden for that record. To view the DLNo, click the blue If there are related records for the ExEmployee, such as Accidents, Attendances, CALogs or Tickets, you will see a blue link that says Accident if there were no related accidents or 3 Accidents if there were three accident records. The Del button is reserved for users with Super user access. You must enter a password to delete the ExEmployee. It then asks if you want to delete the related Accident, Attendance, CALog and Ticket records. Finally, it asks if you want to delete the Applicant record.